Mechanically Attached TPO Systems for Woodbury Buildings
Mechanically attached TPO systems anchor the membrane to the roof deck using metal plates and fasteners driven through the TPO lap seams, rather than adhesive. For Woodbury commercial buildings with steel or concrete decks, this method installs faster, costs less upfront, and tolerates substrate moisture that would prevent adhesion. The membrane is held at the seams, then hot-air welded to create a continuous watertight surface. It suits office parks, retail centers, and warehouse roofs common throughout Woodbury, MN. Understanding the installation sequence helps you evaluate contractor proposals and set accurate budget expectations.
Step 1: Inspect and Prepare the Existing Deck
Before any membrane goes down, the deck surface must be structurally sound and free of standing water, loose fasteners, or deteriorated insulation. In Woodbury buildings, steel decks are common in office and flex-industrial properties, while some older retail structures use poured concrete. Your contractor should probe for soft spots and document any areas needing deck repair. Wet insulation found during this inspection must be removed and replaced before proceeding. Skipping this step voids most manufacturer warranties and leads to premature membrane failure.
Step 2: Install Insulation Boards
Polyisocyanurate insulation boards are mechanically fastened directly to the deck using factory-specified fasteners and stress plates. Board layout should stagger joints to prevent thermal bridging and provide a flat, uniform base. In Minnesota's climate, a minimum R-30 assembly is standard for Woodbury commercial roofs to meet energy code requirements. Fastener density at this layer is calculated based on the deck type, building height, and wind uplift zone. Washington County's exposure to open-terrain wind loads means fastener counts at the perimeter and corners are significantly higher than at the field of the roof.
Step 3: Roll Out and Position the TPO Membrane
TPO rolls are staged on the roof and allowed to relax before positioning. Rolls are laid perpendicular or parallel to the building's long axis depending on the layout plan. Each sheet overlaps the previous one by a minimum of six inches at the side laps and twelve inches at the end laps. Sheet positioning is confirmed before any fastening begins. The Woodbury TPO roofing systems overview covers membrane specifications and thickness options relevant to this planning step.
Step 4: Drive Plates and Fasteners Through the Lap Zone
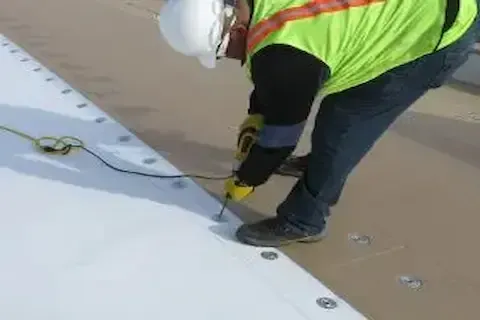
Metal stress plates and screws are installed at the overlap edge of each membrane sheet, penetrating through the TPO, insulation, and into the deck below. This is the defining step in mechanical attachment — the fastener pattern holds the membrane against wind uplift without glue. Fastener type and length are selected based on deck material. Screw-driven plates work for steel decks; masonry anchors are required for concrete. Fastener spacing is tighter at roof edges and corners because those zones experience the highest wind uplift forces, particularly in exposed Woodbury locations near open fields or highway corridors.
Step 5: Hot-Air Weld All Seams
An automatic hot-air welder or hand welder fuses the top sheet over the fastener plates and the bottom sheet below them, creating a continuous thermoplastic bond across the lap. Weld temperatures typically range from 700°F to 1,000°F depending on TPO thickness and ambient conditions. Cold Woodbury mornings in spring and fall require extended warm-up time and slower machine travel speeds to achieve full weld integrity. Welds are probed while still warm using a rounded probe tool — a properly welded seam resists the probe without separating. Failed or suspect welds are re-welded immediately.
Step 6: Flash All Penetrations, Edges, and Drains
Roof penetrations — including HVAC curbs, pipe stacks, exhaust fans, and conduit — are individually flashed with cut-and-fabricated TPO pieces or pre-formed boots, all heat-welded to the field membrane. Edge terminations use metal edge metal or termination bar secured to the wall and sealed. Drain connections receive TPO clamping rings that compress the membrane against the drain body. This step is where most installation failures originate, so detail flashing should be verified item by item. For TPO Roofing Systems installed on multi-tenant Woodbury retail or office buildings, the penetration count can be substantial and adds meaningful time to the project schedule.
Step 7: Conduct a Final Inspection and Document the Installation
A finished mechanically attached TPO roof should be walked in its entirety before the crew demobilizes. The inspection checklist covers weld integrity at all seams and details, fastener plate coverage at laps, drain and edge termination completeness, and cleanliness of the membrane surface. In Woodbury, manufacturer representatives sometimes perform third-party inspections when extended warranties of 20 or 25 years are involved. You should receive a completed inspection report, a warranty registration document, and a set of as-built drawings showing fastener patterns and penetration locations. These records matter when the building changes ownership or an insurance claim arises.
